
TABLE MOUNTAIN: KLOOF CORNER RIDGE
.
.
February 2021
Kloof Corner Ridge is a difficult and technical hike, best suited to those with good fitness levels and a head for heights and adventure. There is a tight section of rock that will need to be navigated, and unfortunately larger individuals will not be able to squeeze through. What makes this route challenging is the use of old steel chains, which are required to scale 3 sections/chimneys of rock. Do not attempt this route alone, even if you are an experienced hiker, rather contact a guide to lead you up. There are sections where once you have committed you cannot turn back.
The route starts at Kloof Corner, and you can make your way up by either following the India Venster trail from the cable car station and turning right once on the contour path, or by following the Kloof corner trail which starts further along the mountain (at the sharp bend in Tafelberg road on your way up). Basically, where you park your car will determine which route to follow up. Once you are at Kloof Corner trig beacon, make your way along the contour path towards the cable car and look for a steel chain hanging off the rock face to your right (±40m from the beacon). This is where the fun begins!
This is the first of 3 chains, which is roughly 4 m long and the easiest. It may look daunting but if you use proper technique and have good upper body strength you will be fine. *Grab the chain tightly and lean back, so that your body is almost parallel to the ground, planting your feet against the rock face. Then use your feet to walk up while using your hands to pull yourself higher up the chain…if you can imagine abseiling in reverse. It does feel scary as you only have your hands to hold you up, but its actually an effective method. Once you have made it up, high five your buddies and follow the path higher, using the cairns for navigation.
The trail will involve some scrambling and possible retracing your steps to find the best way over the rock, but its pretty simple in comparison to what you have just done. If in doubt use the power lines as a reference point, you want to be on the path close to them. Soon enough you will come to huge slab of rock with a 1m walk way running through it. There are some amazing views on the other side. Once you’ve had a look at the views, come back to the walk way. You will need to scale up the rock face on your right ie the cable car will in front of you not behind you. The ledge does get quite narrow around the corner but there are some big hand grips and foot holds to keep you in place.
Once up continue along the path, following the cairns over rocky sections, with the power lines as your guide, and you will eventually come to another section of rock that will need to be climbed. This is the second chimney, and for many the most daunting. Its roughly 3 times as high as the first chain, but it has better foot holds. The challenging part is getting your mind over using the same technique as you used on the first chain. You are high up and it does feel unnatural to hang off the chain this way. But it works if you have the upper body strength. This is where a guide will come in handy, as he/she will have a rope and will be able to secure you. So should your hand slips you will be caught by the rope. For novices or people who are scared of heights we recommend using a rope. This is an extremely dangerous section, if you slip here you will likely not survive the fall. So rather use a rope if you know how to, or go with someone who does. It can be summited without a rope, like we did, as we have confidence in our abilities. But if I had the choice of a rope, I would have roped in. Safety saves lives.
Once safely on top, take a well earned rest…if your adrenaline will let you, and have something to eat and drink. When its time to continue, follow the cairns, scramble some more rock faces and eventually you ill come to “11 inch crack”, which is the last of the 3 chains. Here you will need to squeeze in-between two rock faces, hence the name 11 inch crack. It is rather tight, while the location of foot and hand grips make it awkward. Back packs have to come off to fit through.
Here a rope will come in handy again, as the leader can scale the climb and then hoist the bags up. If you dont have that option, give your bags one by one to the leader who can place them on the ledge up above you, by the chain. It is quite tricky and if the bag falls off the ledge it will be really difficult to get back. So phones and car keys should be kept on you, in zip up pockets or something that will prevent them from falling out. The ledge is exposed, with a large drop off, but it is big enough that you dont feel in danger. This section can also be scaled with out the chain.
Hurray! You have made it up the 3 chains! Now follow the path up to where it joins the India Venster trail and either continue up to the top and come back down via the cable car, or head back down the mountain on the India Venster path. You cannot go back down the way you came up, unless you have ropes and are an experienced mountaineer.
This is a dangerous route and should not be underestimated. People often go up with little experience and make it out in one piece, but accidents can happen very easily, especially when you are nervous. Rather contact someone who knows what they are doing.
*Please note that this is our interpretation of the hike and is not meant to be used for navigation purposes. Hiking can involve dangerous elements, and remember that the weather on top of a mountain is always different to that at the base. Remain aware of your surroundings at all times, wear the appropriate clothing and footwear, don’t litter and stick to the foot paths. Do not light a fire no matter what. The climbing technique described above is what we feel comfortable with and is not a recommendation or advice. We hold no responsibility or liability for any injury, loss, or death resulting from using the chains without proper supervision.
NEED TO KNOW:
- DURATION: 3 – 6 hours depending on your fitness levels and route down.
- DISTANCE: ± 6 km
- EFFORT LEVEL: 9/10
- TECHNICAL DIFFICULTY: 9/10
- REQUIREMENTS: Comfortable shoes, water bottle, snacks, warm top. Rope is advisable.
- ENTRY FEE: No entry fee. Cable car ticket down is R200.
- AMENITIES: Toilets, restaurant etc at cable station
- SAFETY: 8/10 Always monitor your surroundings.
- ACCESSIBILITY: You will need to be fit, have good upper body strength and a head for heights. Not advisable for novices or small kids.
- SCENERY: 10/10

TABLE MOUNTAIN:
KLOOF CORNER RIDGE



February 2021
Kloof Corner Ridge is a difficult and technical hike, best suited to those with good fitness levels and a head for heights and adventure. There is a tight section of rock that will need to be navigated, and unfortunately larger individuals will not be able to squeeze through. What makes this route challenging is the use of old steel chains, which are required to scale 3 sections/chimneys of rock. Do not attempt this route alone, even if you are an experienced hiker, rather contact a guide to lead you up. There are sections where once you have committed you cannot turn back.
The route starts at Kloof Corner, and you can make your way up by either following the India Venster trail from the cable car station and turning right once on the contour path, or by following the Kloof corner trail which starts further along the mountain (at the sharp bend in Tafelberg road on your way up). Basically, where you park your car will determine which route to follow up. Once you are at Kloof Corner trig beacon, make your way along the contour path towards the cable car and look for a steel chain hanging off the rock face to your right (±40m from the beacon). This is where the fun begins!
This is the first of 3 chains, which is roughly 4 m long and the easiest. It may look daunting but if you use proper technique and have good upper body strength you will be fine. *Grab the chain tightly and lean back, so that your body is almost parallel to the ground, planting your feet against the rock face. Then use your feet to walk up while using your hands to pull yourself higher up the chain…if you can imagine abseiling in reverse. It does feel scary as you only have your hands to hold you up, but its actually an effective method. Once you have made it up, high five your buddies and follow the path higher, using the cairns for navigation.
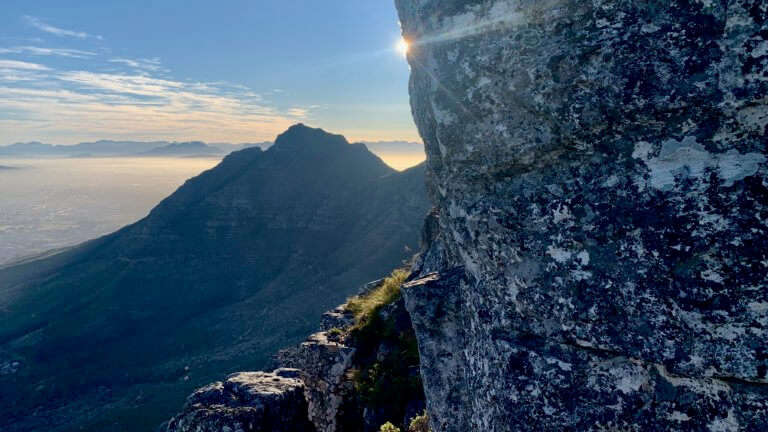
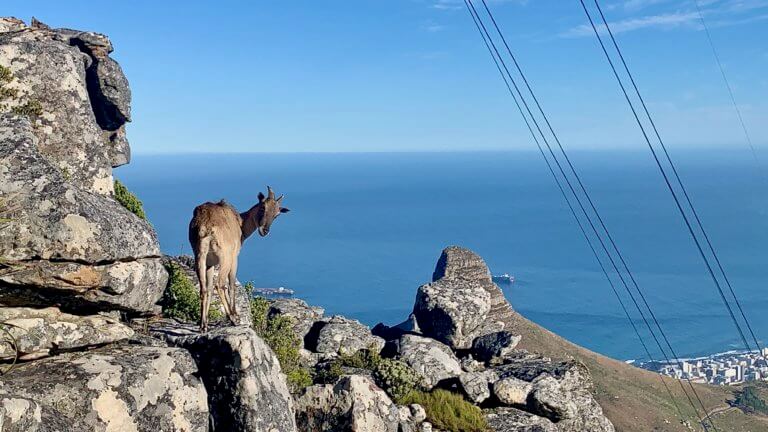
The trail will involve some scrambling and possible retracing your steps to find the best way over the rock, but its pretty simple in comparison to what you have just done. If in doubt use the power lines as a reference point, you want to be on the path close to them. Soon enough you will come to huge slab of rock with a 1m walk way running through it. There are some amazing views on the other side. Once you’ve had a look at the views, come back to the walk way. You will need to scale up the rock face on your right ie the cable car will in front of you not behind you. The ledge does get quite narrow around the corner but there are some big hand grips and foot holds to keep you in place.
Once up continue along the path, following the cairns over rocky sections, with the power lines as your guide, and you will eventually come to another section of rock that will need to be climbed. This is the second chimney, and for many the most daunting. Its roughly 3 times as high as the first chain, but it has better foot holds. The challenging part is getting your mind over using the same technique as you used on the first chain. You are high up and it does feel unnatural to hang off the chain this way. But it works if you have the upper body strength. This is where a guide will come in handy, as he/she will have a rope and will be able to secure you. So should your hand slips you will be caught by the rope. For novices or people who are scared of heights we recommend using a rope. This is an extremely dangerous section, if you slip here you will likely not survive the fall. So rather use a rope if you know how to, or go with someone who does. It can be summited without a rope, like we did, as we have confidence in our abilities. But if I had the choice of a rope, I would have roped in. Safety saves lives.
Once safely on top, take a well earned rest…if your adrenaline will let you, and have something to eat and drink. When its time to continue, follow the cairns, scramble some more rock faces and eventually you ill come to “11 inch crack”, which is the last of the 3 chains. Here you will need to squeeze in-between two rock faces, hence the name 11 inch crack. It is rather tight, while the location of foot and hand grips make it awkward. Back packs have to come off to fit through.
Here a rope will come in handy again, as the leader can scale the climb and then hoist the bags up. If you dont have that option, give your bags one by one to the leader who can place them on the ledge up above you, by the chain. It is quite tricky and if the bag falls off the ledge it will be really difficult to get back. So phones and car keys should be kept on you, in zip up pockets or something that will prevent them from falling out. The ledge is exposed, with a large drop off, but it is big enough that you dont feel in danger. This section can also be scaled with out the chain.
Hurray! You have made it up the 3 chains! Now follow the path up to where it joins the India Venster trail and either continue up to the top and come back down via the cable car, or head back down the mountain on the India Venster path. You cannot go back down the way you came up, unless you have ropes and are an experienced mountaineer.
This is a dangerous route and should not be underestimated. People often go up with little experience and make it out in one piece, but accidents can happen very easily, especially when you are nervous. Rather contact someone who knows what they are doing.
NEED TO KNOW:
- DURATION: 3 – 6 hours depending on your fitness levels and route down.
- DISTANCE: ± 6 km
- EFFORT LEVEL: 9/10
- TECHNICAL DIFFICULTY: 9/10
- REQUIREMENTS: Comfortable shoes, water bottle, snacks, warm top. Rope is advisable.
- ENTRY FEE: No entry fee. Cable car ticket down is R200.
- AMENITIES: Toilets, restaurant etc at cable station
- SAFETY: 8/10 Always monitor your surroundings.
- ACCESSIBILITY: You will need to be fit, have good upper body strength and a head for heights. Not advisable for novices or small kids.
- SCENERY: 10/10
*Please note that this is our interpretation of the hike and is not meant to be used for navigation purposes. Hiking can involve dangerous elements, and remember that the weather on top of a mountain is always different to that at the base. Remain aware of your surroundings at all times, wear the appropriate clothing and footwear, don’t litter and stick to the foot paths. Do not light a fire no matter what. The climbing technique described above is what we feel comfortable with and is not a recommendation or advice. We hold no responsibility or liability for any injury, loss, or death resulting from using the chains without proper supervision.
TABLE MOUNTAIN:
KLOOF CORNER RIDGE
February 2021
Kloof Corner Ridge is a difficult and technical hike, best suited to those with good fitness levels and a head for heights and adventure. There is a tight section of rock that will need to be navigated, and unfortunately larger individuals will not be able to squeeze through. What makes this route challenging is the use of old steel chains, which are required to scale 3 sections/chimneys of rock. Do not attempt this route alone, even if you are an experienced hiker, rather contact a guide to lead you up. There are sections where once you have committed you cannot turn back.
The route starts at Kloof Corner, and you can make your way up by either following the India Venster trail from the cable car station and turning right once on the contour path, or by following the Kloof corner trail which starts further along the mountain (at the sharp bend in Tafelberg road on your way up). Basically, where you park your car will determine which route to follow up. Once you are at Kloof Corner trig beacon, make your way along the contour path towards the cable car and look for a steel chain hanging off the rock face to your right (±40m from the beacon). This is where the fun begins!
This is the first of 3 chains, which is roughly 4 m long and the easiest. It may look daunting but if you use proper technique and have good upper body strength you will be fine. *Grab the chain tightly and lean back, so that your body is almost parallel to the ground, planting your feet against the rock face. Then use your feet to walk up while using your hands to pull yourself higher up the chain…if you can imagine abseiling in reverse. It does feel scary as you only have your hands to hold you up, but its actually an effective method. Once you have made it up, high five your buddies and follow the path higher, using the cairns for navigation.
The trail will involve some scrambling and possible retracing your steps to find the best way over the rock, but its pretty simple in comparison to what you have just done. If in doubt use the power lines as a reference point, you want to be on the path close to them. Soon enough you will come to huge slab of rock with a 1m walk way running through it. There are some amazing views on the other side. Once you’ve had a look at the views, come back to the walk way. You will need to scale up the rock face on your right ie the cable car will in front of you not behind you. The ledge does get quite narrow around the corner but there are some big hand grips and foot holds to keep you in place.
Once up continue along the path, following the cairns over rocky sections, with the power lines as your guide, and you will eventually come to another section of rock that will need to be climbed. This is the second chimney, and for many the most daunting. Its roughly 3 times as high as the first chain, but it has better foot holds. The challenging part is getting your mind over using the same technique as you used on the first chain. You are high up and it does feel unnatural to hang off the chain this way. But it works if you have the upper body strength. This is where a guide will come in handy, as he/she will have a rope and will be able to secure you. So should your hand slips you will be caught by the rope. For novices or people who are scared of heights we recommend using a rope. This is an extremely dangerous section, if you slip here you will likely not survive the fall. So rather use a rope if you know how to, or go with someone who does. It can be summited without a rope, like we did, as we have confidence in our abilities. But if I had the choice of a rope, I would have roped in. Safety saves lives.
Once safely on top, take a well earned rest…if your adrenaline will let you, and have something to eat and drink. When its time to continue, follow the cairns, scramble some more rock faces and eventually you ill come to “11 inch crack”, which is the last of the 3 chains. Here you will need to squeeze in-between two rock faces, hence the name 11 inch crack. It is rather tight, while the location of foot and hand grips make it awkward. Back packs have to come off to fit through.
Here a rope will come in handy again, as the leader can scale the climb and then hoist the bags up. If you dont have that option, give your bags one by one to the leader who can place them on the ledge up above you, by the chain. It is quite tricky and if the bag falls off the ledge it will be really difficult to get back. So phones and car keys should be kept on you, in zip up pockets or something that will prevent them from falling out. The ledge is exposed, with a large drop off, but it is big enough that you dont feel in danger. This section can also be scaled with out the chain.
Hurray! You have made it up the 3 chains! Now follow the path up to where it joins the India Venster trail and either continue up to the top and come back down via the cable car, or head back down the mountain on the India Venster path. You cannot go back down the way you came up, unless you have ropes and are an experienced mountaineer.
This is a dangerous route and should not be underestimated. People often go up with little experience and make it out in one piece, but accidents can happen very easily, especially when you are nervous. Rather contact someone who knows what they are doing.
NEED TO KNOW:
- DURATION: 3 – 6 hours depending on your fitness levels and route down.
- DISTANCE: ± 6 km
- EFFORT LEVEL: 9/10
- TECHNICAL DIFFICULTY: 9/10
- REQUIREMENTS: Comfortable shoes, water bottle, snacks, warm top. Rope is advisable.
- ENTRY FEE: No entry fee. Cable car ticket down is R200.
- AMENITIES: Toilets, restaurant etc at cable station
- SAFETY: 8/10 Always monitor your surroundings.
- ACCESSIBILITY: You will need to be fit, have good upper body strength and a head for heights. Not advisable for novices or small kids.
- SCENERY: 10/10
*Please note that this is our interpretation of the hike and is not meant to be used for navigation purposes. Hiking can involve dangerous elements, and remember that the weather on top of a mountain is always different to that at the base. Remain aware of your surroundings at all times, wear the appropriate clothing and footwear, don’t litter and stick to the foot paths. Do not light a fire no matter what. The climbing technique described above is what we feel comfortable with and is not a recommendation or advice. We hold no responsibility or liability for any injury, loss, or death resulting from using the chains without proper supervision.